Loading a File onto the Rabbit Laser Cutter
- Be sure you have the DXF file of your part on a USB drive or somewhere you can access it from your account.
- Find an open laser cutter and press Ctrl-Alt-Delete to begin the login process. Login to the connected PC with your Andrew user name and password.
- Open the RDWorks software.

- From the RDWorks menu, choose File → Import to bring your DXF file into the laser cutter software. (Do not use Open. Open is only for files saved from RDWorks.)
- Press the Escape key to deselect all the lines. This will allow you to see the colors representing different layers of your design.
- If you need to rescale you drawing, select everything (Ctrl + A) and then rescale with the icon handles. The scaling is in millimeters. 1 inch = 25.4 mm.To scale in proportion to the original scale factor, type in the length in either the X or Y and then press enter.

To scale X and Y separately, enter the appropriate number for each. - You can select individual lines and sections of your file by using the “Group” and “Ungroup” options:

- Make any necessary adjustments to the size and position of your file.
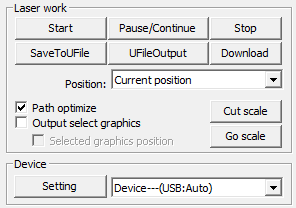
- To correctly position the laser head, be sure to select Laser work > Current Position:
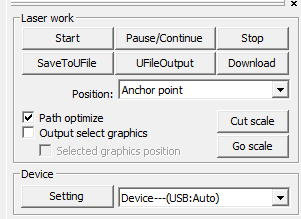
- The green dot is where the laser will start to cut if you have Laser work > Anchor point selected:
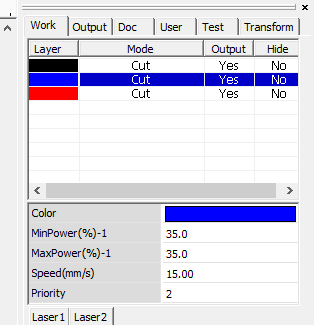
- Set the colors (layers) and their corresponding settings in the right side panel. New colors may be introduced to lines to set separate cutting and engraving operations. Typical settings may be found at the back of this binder. Settings will vary between materials and from laser cutter to laser cutter.
- A new operation will be added for each layer-color you add. Be certain to drag the operations into the order you want them to be performed (top down). Be sure to set the proper operation for each by double clicking the “mode” tab:
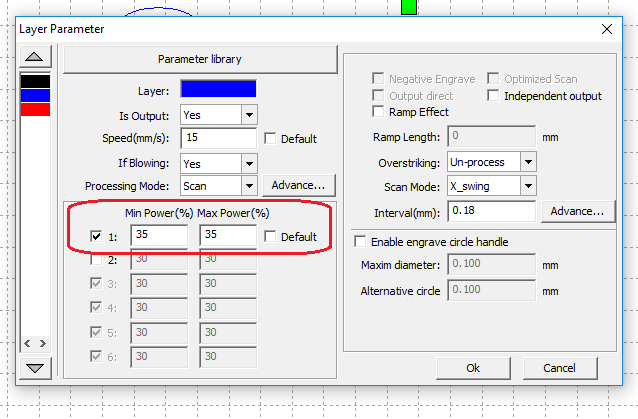
- Once in Layer Parameters, select the processing mode for the particular layer you want to change (cut/score, scan, etc.). NOTE – “Scan“ is the engrave setting. Be sure to set the proper speed. MinPower and MaxPower should be set the same. DO NOT check any other boxes. These are for multiple laser cutting machines; we only have one tube.
- In the bottom right of the screen, under Laser Work, select Download.
- You will be prompted to name your file. The filename can have up to 8 characters. This filename will only be used by the laser cutter’s controller card. If you wish to save your design as an RDWorks file, use the RDWorks menu bar, click on menu File > Save, or click the disk icon.