Cutting a Part on the Rabbit Laser Cutter
Safety First!
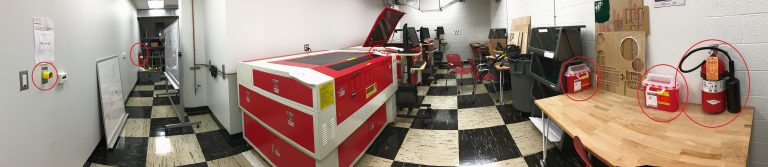
- Note the locations of the nearest fire extinguisher, electrical emergency stop (the red button with yellow cap located on the wall by the double doors), first aid kit, and laser cutter emergency stop.
- Protective gloves and safety glasses are available in the laser cutting room.
- If your material catches on fire, press the red Emergency Stop in the panel on the right side of the laser cutter.
- You can usually blow out small flames in cardboard. Acrylic will sometimes generate a brief flame that burns out quickly. Never use poly-carbonate; it will burn.
- For any fire that does not immediately go out, use the Carbon Dioxide fire extinguisher (CO2 for Class C fire) located in the room.
- CO2 extinguishers have a short range, so point the nozzle directly at the base of the flames.
- Be careful because acrylic is brittle and can crack. Thick acrylic cuts tend to melt back together. Use a tool to press out the small pieces. Safety glasses and gloves are recommended when removing any stuck parts.
- Take caution to prevent prolonged contact with any burnt residue from any laser cut material. These residues may be irritating or toxic. Do not get any residue in your mouth.
- Be sure to wash your freshly cut plastic parts to remove residues.
- Wash your hands after handling freshly cut plastics.
Power On the Laser Cutter
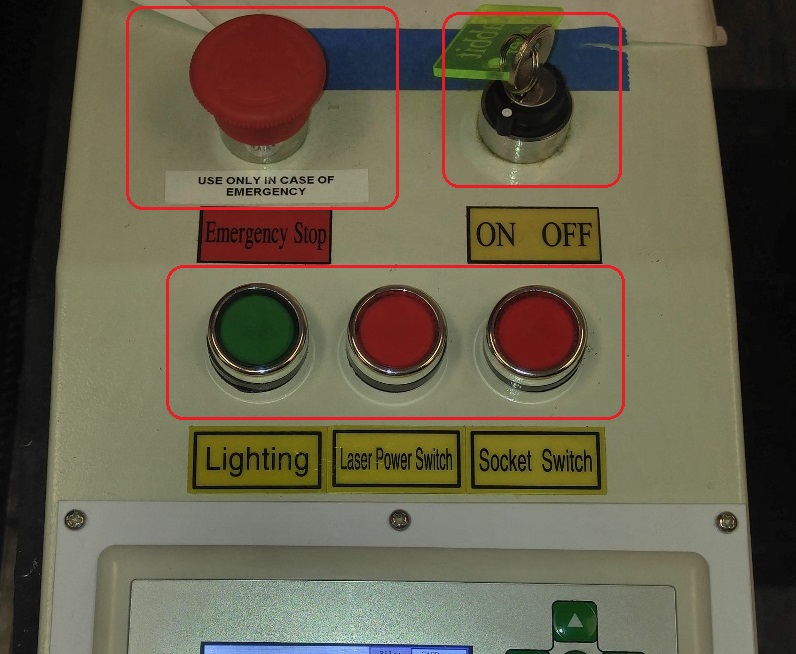
1. The Rabbit Laser’s rotary power switch (with the key) should normally be kept on at all times, but if it is off, turn the key to the “On” position.
2. The red emergency stop button should be deactivated in the upward position. Twist the button in the clockwise direction to make sure it pops out into the upward position.
3. Make sure all three pushbuttons at the top of the control are depressed
– The green “Lighting” button controls the internal fluorescent light.
– The red “Laser Power Switch” controls power to the laser tube.
– The red “Socket Switch” controls power to the chiller and air pump.
4. Allow the chiller and air pump to run at least 30 seconds prior to any beginning any laser cutting or engraving operation.
Preparation and Cutting
Note: Before applying this process to good material, make sure to test your laser power settings on a scrap piece of the same or similar material.
1. Open the top lid of the laser cutter.
2. On the control panel of the laser cutter, press the Esc button to get to normal mode (no highlighting). If there is something highlighted, the laser cutter will ignore your commands.
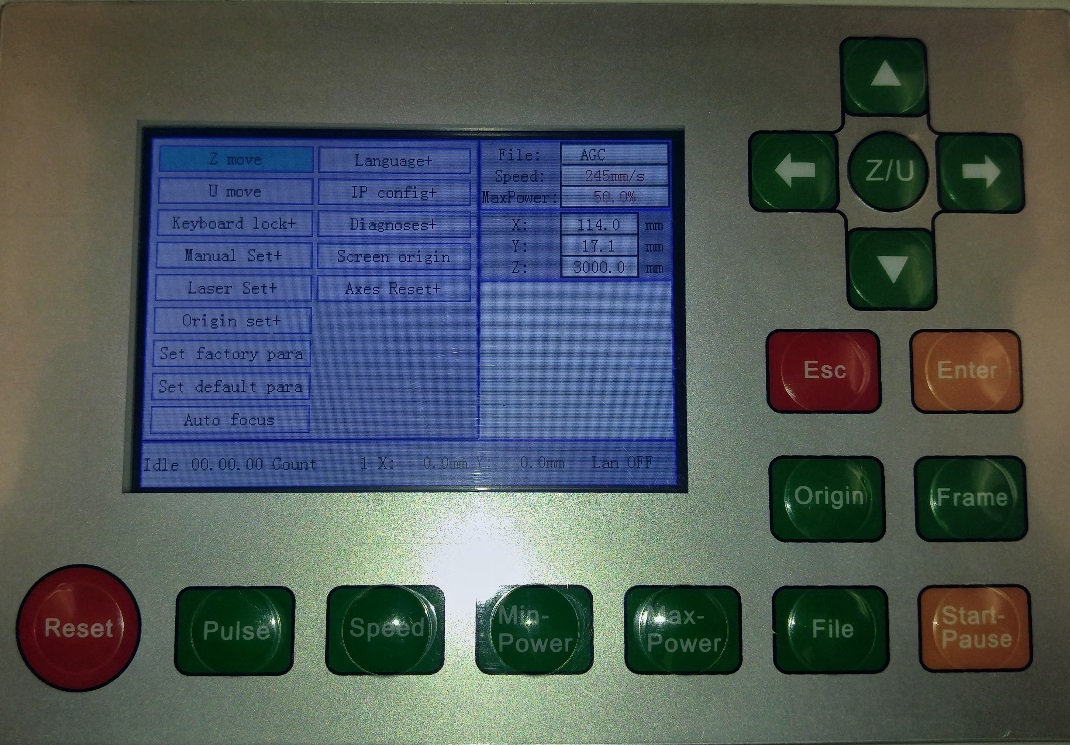
3. Again, on the control panel, press the red Reset button. This will move the focal tube to the back of the laser cutter and will ensure that the controller card operates from the correct X-Y home.
4. If necessary, to make room for your material, the bed can be raised or lowered with the motion control buttons.
– First, select Z/U.
– Once in the menu, use the left and right arrows to raise and lower the bed.
Material Placement
1. Acrylic
– Most acrylic sheets will have a paper backer. The paper may be removed by peeling, however, the paper also protects the acrylic from staining and excess melting near the laser cut. Keeping as much paper on as possible will simplify clean-up of the parts after laser operations.
– For many, small parts, remove the paper backer from both sides of the acrylic.
– For larger parts, the paper may be kept on both sides or removed from the top side.
2. Wood
– Make sure wood sheets are not warped. Warped wood may hook onto the focal tube, ruining your cut and, possibly, damaging the laser cutter.
– Each surface of a piece of wood may look different. If you want a certain side or area to show, make sure to check the orientation of the wood prior to cutting.
3. Cardboard
– Make sure it is not warped too much. Cardboard may be arranged so that the bed suction will pull it flat. The more bed surface that is covered, the greater the suction effect will be. Additional pieces of cardboard or paper arranged around your work will help created a stronger suction.
Final Set-up
1. Exit the menu and use the four, green and white, arrow symbol, motion control buttons to position the laser focal tube above your material.
2. Press the Z/U button and navigate to Auto Focus.
3. Once you have set the laser to fire from Current Position, aligned the head over your work, and have homed the Z-axis using Auto Focus – press the Origin button. This sets the beginning firing position to where you have moved the head.
4. Press the Frame Button on the cutter’s control panel. This will move the head around the perimeter of the cut area.
5. Close the lid. The lid must be closed for the laser to fire. If you open the lid while the laser is running, your job will stop.
6. Press the yellow Start button. (NOTE: The Start button also functions as a “pause” button. You may use this button if you have to check your work or leave the laser cutter for a moment.)
7. ABORT: Press the red Reset button to halt your job before completion. The lens assembly will return to the origin you set in the previous steps.
Finish and Clean-Up
1. The laser cutter beeps three times when it has completed the cut. Leave the lid closed for 30 seconds to allow extraction of hazardous fumes.
2. Remove your parts and pieces. Vacuum small debris from the table and equipment. Do not try to lift up the laser bed.
3. Place usable scraps in scrap bins. Place unusable scraps in the trash. (If it looks useless, then it probably is and should go in the trash. Please DO NOT LEAVE SCRAPS ON THE TABLES OR FLOORS.
4. POWER-OFF: Push off the lighting, power and socket buttons located on the control panel.
5. Leave the Rotary Power Switch (with the key) in the ON position and make sure the Emergency Stop is not active.
6. Remember to take your USB drive and other personal belongings with you.